Summary: in this tutorial, you’ll learn about the JavaScript drag and drop API and how to use it to implement a simple drag&drop application.
Introduction to JavaScript Drag and Drop API
HTML5 formally introduced the drag-and-drop specification. Most modern web browsers have implemented native drag-and-drop based on the HTML5 spec.
By default, only image and text can be draggable. To drag an image, you simply hold the mouse button down and then move it. To drag the text, you need to highlight some text and drag it in the same way as you would drag an image.
HTML5 spec specifies that almost all elements can be draggable. To make an element draggable, you add the draggable property with the value of true to its HTML tag. For example:
<div class="item" draggable="true"></div>Code language: HTML, XML (xml)Events on draggable elements
When you drag an element, these events fire in the following sequence:
dragstartdragdragend
When you hold a mouse button and begin to move the mouse, the dragstart event fires on the draggable element that you’re dragging. The cursor changes to a no-drop symbol (a circle with a line through it) to indicate that you cannot drop the element on itself.
After the dragstart event fires, the drag event fires repeatedly as long as you drag the element.
And The dragend event fires when you stop dragging the element.
The target of all events (e.target) is the element that is being dragged.
By default, the browser doesn’t change the appearance of the dragged element. Therefore, you can customize its appearance based on your preferences.
Events on drop targets
When you drag an element over a valid drop target, these events fire in the following sequence:
dragenterdragoverdragleaveordrop
The dragenter event fires as soon as you drag the element over a drop target.
After the dragenter event fires, the dragover event fires repeatedly as long as you’re dragging the element within the boundary of the drop target.
When you drag the element outside of the boundary of the drop target, the dragover event stops firing and the dragleave event fires.
In case you drop the element on the target, the drop event fires instead of the dragleave event.
The target (e.target) of the dragenter, dragover, dragleave, and drop events are the drop target elements.
Valid drop target
Almost all elements support the drop target events (dragenter, dragover, dragleave, and drop). However, they don’t allow dropping by default.
If you drop an element over a drop target that doesn’t allow to drop, the drop event won’t fire.
To turn an element into a valid drop target, you can override the default behavior of both dragenter and dragover events by calling the event.preventDefault() method in their corresponding event handlers. (See the example section for more information)
Transfer data using dataTransfer object
To transfer data in a drag-and-drop action, you use the dataTransfer object.
The dataTransfer object is a property of the event. It allows you to transfer data from the dragged element to the drop target.
The dataTransfer object has two methods: setData() and getData().
The setData() allows you to set the drag operation’s data to the specified format and data:
dataTransfer.setData(format, data)Code language: CSS (css)The format can be text/plain or text/uri-list. And the data can be a string representing the data to add to the drag object.
The getData() method retrieves the drag data stored by the setData() method.
The getData() accepts one argument:
dataTransfer(format)The format can be text/plain or text/uri-list. The getData() returns a string stored by the setData() method or an empty string if the drag operation doesn’t include data.
JavaScript drag and drop example
We’ll develop the following simple drag-and-drop application to demonstrate the JavaScript drag and drop API:
Create the project structure
First, create a new folder called drag-n-drop-basics. Inside this folder, create two subfolders called css and js.
Second, create a new file called app.js in the js folder, style.css in the css folder, and index.html in the drag-n-drop-basics folder.
Third, place the link to the style.css and script tag that links to the app.js in the index.html file like this:
<!DOCTYPE html>
<html lang="en">

<head>
    <meta charset="UTF-8">
    <meta name="viewport" content="width=device-width, initial-scale=1.0">
    <title>JavaScript - Drag and Drop Demo</title>
    <link rel="stylesheet" href="css/style.css">
</head>

<body>

    <script src="js/app.js"></script>
</body>

</html>Code language: HTML, XML (xml)
For the CSS, you can grab it from here.
Build the index.html file
Place the following code in the index.html file:
<!DOCTYPE html>
<html lang="en">

<head>
    <meta charset="UTF-8">
    <meta name="viewport" content="width=device-width, initial-scale=1.0">
    <title>JavaScript - Drag and Drop Demo</title>
    <link rel="stylesheet" href="css/style.css">
</head>

<body>
    <div class="container">
        <h1>JavaScript - Drag and Drop</h1>
        <div class="drop-targets">
            <div class="box">
                <div class="item" id="item">
                </div>
            </div>
            <div class="box"></div>
            <div class="box"></div>
        </div>
    </div>
    <script src="js/app.js"></script>
</body>

</html>Code language: HTML, XML (xml)
In this index.html file, we used the .container element to align the heading and drop-targets element.
Inside the drop-targets element, we placed three div elements with the same class box. And we place another div element with the class item in the first box.
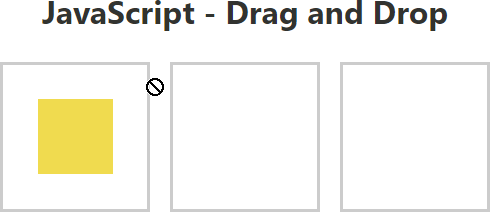
If you open the index.html and try to drag the yellow box, you’ll see the cursor indicating that you cannot drag:
To make the element draggable, you add the draggable property with the value of true to its HTML tag as follows:
<div class="item" id="item" draggable="true">Code language: JavaScript (javascript)Now, if you save the index.html, open it in the browser again, you’ll see that you can drag the item element like this:
Handle events on the draggable element
The style.css file has the .hide class that hides an element:
.hide {
    display: none;
}Code language: CSS (css)
In the app.js file, you add the following code:
// select the item element
const item = document.querySelector('.item');

// attach the dragstart event handler
item.addEventListener('dragstart', dragStart);

// handle the dragstart

function dragStart(e) {
   console.log('drag starts...');
}
Code language: JavaScript (javascript)
How it works:
- First, select the draggable element using the
querySelector(). - Second, attach a
dragstartevent handler to the draggable element. - Third, define the
dragStart()function to handle thedragstartevent.
If you open the index.html file and start dragging the draggable element, you’ll see the drag starts... message in the console.
In the dragStart event handler, you need to store the id of the draggable element. And you need to hide it:
function dragStart(e) {
    e.dataTransfer.setData('text/plain', e.target.id);
    e.target.classList.add('hide');
}Code language: JavaScript (javascript)
If you drag the element, you’ll see that it disappears once you start dragging.
To solve this, you use the setTimeout() function:
function dragStart(e) {
    e.dataTransfer.setData('text/plain', e.target.id);
    setTimeout(() => {
        e.target.classList.add('hide');
    }, 0);

}Code language: JavaScript (javascript)
Now, you can drag the draggable element out of its original position:
Handle events on drop targets
The style.css file also has a CSS class called .drag-over that turns the border style of the drop target into dashed and red:
.drag-over {
    border: dashed 3px red;
}
Code language: CSS (css)
In the app.js, you need to select the drop target elements and handle the dragenter, dragover, dragleave, and drop events of these elements:
const boxes = document.querySelectorAll('.box');

boxes.forEach(box => {
    box.addEventListener('dragenter', dragEnter)
    box.addEventListener('dragover', dragOver);
    box.addEventListener('dragleave', dragLeave);
    box.addEventListener('drop', drop);
});

function dragEnter(e) {
}

function dragOver(e) {
}

function dragLeave(e) {
}

function drop(e) {
}
Code language: JavaScript (javascript)
The border style of the drop target should change when the dragenter and dragover event occurs. It should restore the style when the dragleave and drop event occurs.
To do it, you add and remove the drag-over class to the drop target like this:
function dragEnter(e) {
e.target.classList.add('drag-over');
}
function dragOver(e) {
e.target.classList.add('drag-over');
}
function dragLeave(e) {
e.target.classList.remove('drag-over');
}
function drop(e) {
e.target.classList.remove('drag-over');
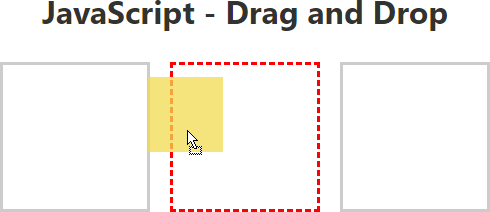
}Code language: JavaScript (javascript)Now, if you drag the draggable element to another drop target, you’ll see that the border of the drop target changes as shown in the following picture:

To make the drop target valid, you need to call event.preventDefault() in the dragenter and dragover event handlers like this:
function dragEnter(e) {
    e.preventDefault();
    e.target.classList.add('drag-over');
}

function dragOver(e) {
    e.preventDefault();
    e.target.classList.add('drag-over');
}Code language: JavaScript (javascript)
If you don’t do this, the drop event will never fire because the div element is not a valid drop target by default.
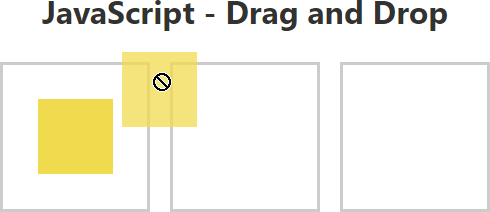
If you drag the draggable element to a drop target, you’ll see that the cursor changes indicating that you can drop the element:
Now, if you drop the item element, you’ll see that it disappears immediately.
To solve this issue, you need to add handle the drop event.
- First, get the
idof the draggable element using thegetData()method of thedataTransferobject. - Second, append the draggable element as a child element of the drop target element.
- Third, remove the
hideclass from thedraggableelement.
The following code shows the complete drop event handler:
function drop(e) {
e.target.classList.remove('drag-over');
// get the draggable element
const id = e.dataTransfer.getData('text/plain');
const draggable = document.getElementById(id);
// add it to the drop target
e.target.appendChild(draggable);
// display the draggable element
draggable.classList.remove('hide');
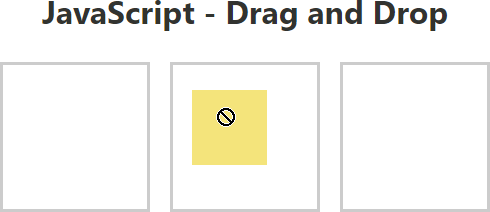
}Code language: JavaScript (javascript)If you drag and drop the draggable element now, it should work as expected.
The following shows the complete app.js file:
/* draggable element */
const item = document.querySelector('.item');

item.addEventListener('dragstart', dragStart);

function dragStart(e) {
    e.dataTransfer.setData('text/plain', e.target.id);
    setTimeout(() => {
        e.target.classList.add('hide');
    }, 0);
}


/* drop targets */
const boxes = document.querySelectorAll('.box');

boxes.forEach(box => {
    box.addEventListener('dragenter', dragEnter)
    box.addEventListener('dragover', dragOver);
    box.addEventListener('dragleave', dragLeave);
    box.addEventListener('drop', drop);
});


function dragEnter(e) {
    e.preventDefault();
    e.target.classList.add('drag-over');
}

function dragOver(e) {
    e.preventDefault();
    e.target.classList.add('drag-over');
}

function dragLeave(e) {
    e.target.classList.remove('drag-over');
}

function drop(e) {
    e.target.classList.remove('drag-over');

    // get the draggable element
    const id = e.dataTransfer.getData('text/plain');
    const draggable = document.getElementById(id);

    // add it to the drop target
    e.target.appendChild(draggable);

    // display the draggable element
    draggable.classList.remove('hide');
}Code language: JavaScript (javascript)
And here is the link to the demo.
Summary
- Add the
draggableproperty with the value of true to an element to make it draggable. - The
dragstart,drag, anddragendevents fire on the draggable element. - The
dragenter,dragover,dragleaveordropevents fire on the drop target. - Call the
event.preventDefault()on thedragenteranddragoverevent handlers to make an element a valid drop target. - Use the
event.dataTransferobject with thesetData()andgetData()methods to transfer data in the drag-and-drop operation.